
Waterproofing Details for the Wondercap Short Kit - WC100SK
Installation Instructions:
Tips & Tricks:
Always read the waterproofing manufacturer's requirements prior to installation.
Product Material: The puddle flange is made from durable ABS plastic.
Primer Required: A non-porous primer is required to prime the cleaned surface area as needed.
Test Plugs: Lightweight test plugs are available for easy installation when ordering our products from your local supplier.
Test Plug Installation: Remove the base and insert the test plug into the mouth of the puddle flange to prevent bedding from entering the drain.
Waterproofing & Bedding: Install the tile bedding layer of waterproofing and bonding strips across the puddle flange and into the rebate. Allow the waterproofing membrane to completely dry.
Review Videos: Before starting, review our video page or scan the QR code to download and view the professionally installed waterproofing membrane.
Required Information:
Review the waterproofing manufacturer's requirements for water testing the shower membrane area, especially concerning curing time for the membrane product you're installing.
Installation Steps:
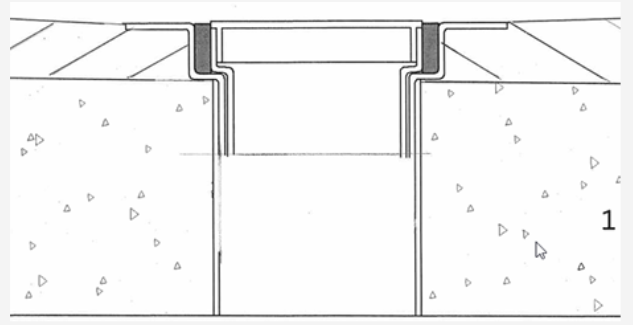
Set up the Base & Cap: Position the base and cap to the required level for the bedding datum.
Note: The NCC requirement for shower bedding is a 1:80 grade towards the drain. This is mandatory!
Bedding Thickness: The recommended bedding thickness is a minimum of 30mm depth, finishing flush with the top of the puddle flange.
Bedding Installation: Install the bedding and pack the sand and cement under the flange, ensuring the bedding finishes flush with the puddle flange.
Drying: Allow the bedding to completely dry prior to waterproofing.
Waterproofing Coats:
Apply the first coat of waterproofing and allow it to completely dry before applying the second coat.
Apply the second coat of waterproofing and allow it to dry thoroughly.
Note: The NCC highly recommends water testing of the waterproofing membrane, but it is not mandatory!
Benefits:
The test plug is easily inserted into the mouth of the puddle flange and can be used for water testing to ensure the waterproofing membrane is watertight.
When conducting a water test, remember to record and date the results for your records.
Review water testing procedures by scanning the QR code for additional video guidance.
Final Installation Steps:
Insert the Base & Cap: Raise the base and cap to the required finishing bedding height or grate height.
Hold in Position: The base and cap should be held in place with a damp bedding mix under the edge of the grate adapter, base, and cap.
Fill the Gap: Install the bedding mix to fill the gap between the grate, base, and cap, ensuring the bedding is level with the finished height.
Additional Tips & Tricks:
The base and cap can be raised to suit the finished height and can be packed into place using sand and bedding.
If the grate ends up lower than the finished tile height, the push-in cap lip can be cut down and used as a spacer ring to support the finished height of the grate.